Tutorials
How To Code A Timeline Of Events
by Rubie Tiburcio
A step-by-step instruction on how to build a basic timeline web page using Sitecast Editor.

Create A New Site
From the dashboard, click the build new site or New Site button. Add the name of the site. Select and click the Learn More button from the Blank App card. Please read the prerequisite and the third-party tools used. This will help you fully understand the system and also learn the framework so you can rapidly build sites on the web.
In this example, we will be using basic HTML, CSS/SCSS, and the Bootstrap framework to keep it simple.
Sitecast Editor
Select and click Install And Start Coding. This will take you to the code editor of the app.

These are the pre-configured files when you start building a new app:
application.html is the HTML document.
main.js which processes all the javascript code.
sitecast.config.yml which adds the third-party integrations such as Bootstrap and Font Awesome.
main.scss which is where you would put your custom css/scss configurations.
Instant Development Environment

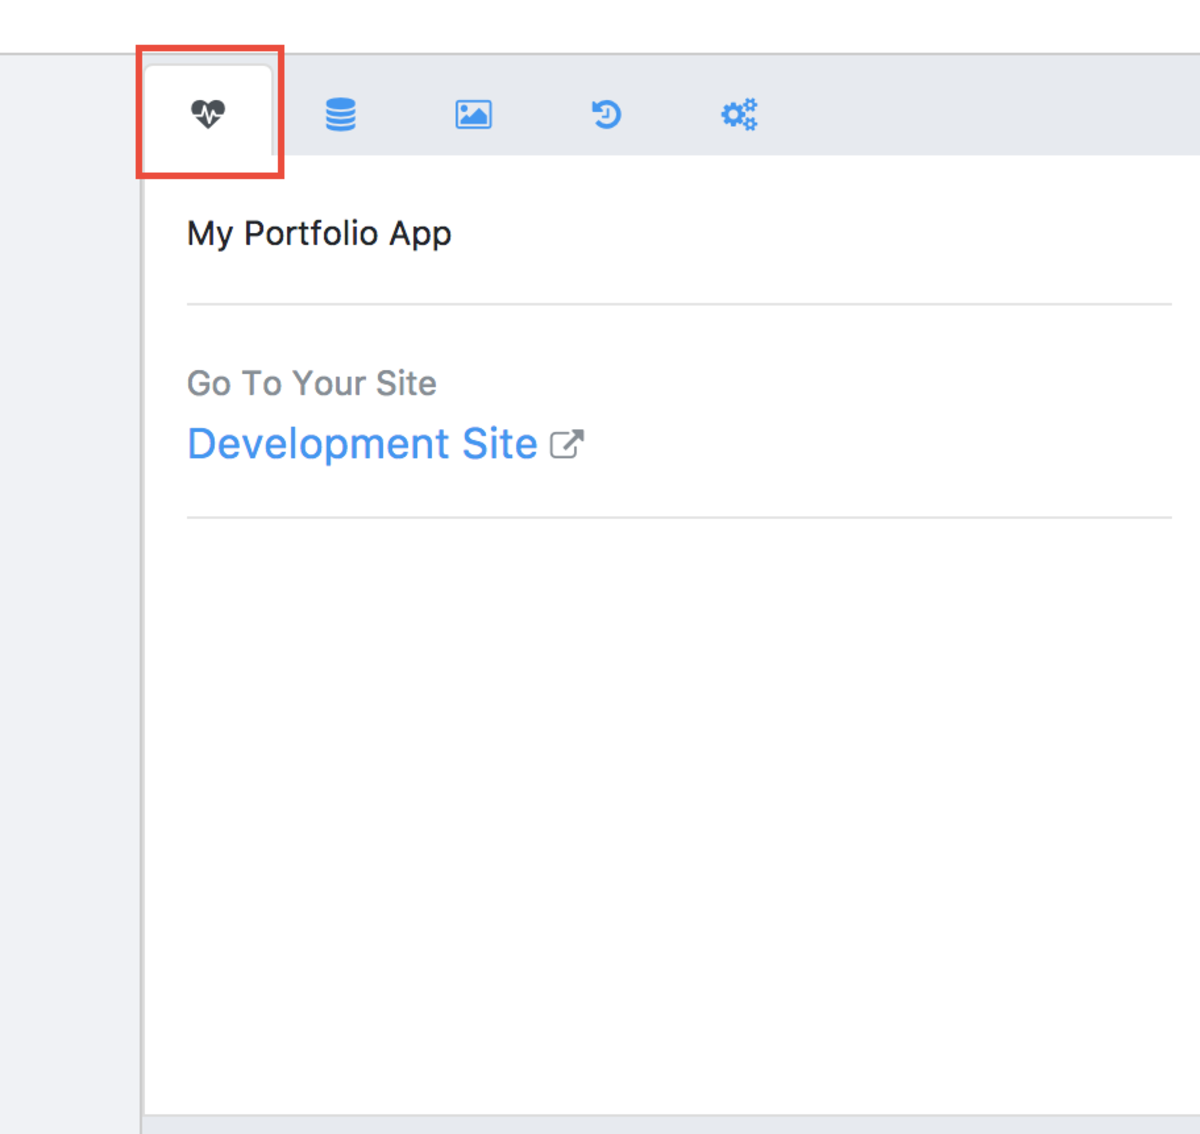
The development environment is automatically set up to save you time. In the toolbar, go to the app detail tab. Click the Development Site. This is the cloud development environment for your site.
Screens and Blocks
For this tutorial, select a blank app. By default, the blank app's initial screen and blocks will be created -- all is configurable. Browse the tools to get familiar with the screens and the blocks concept when building pages. In this example, the cover block is attached to the start screen, along with the navbar and footer.
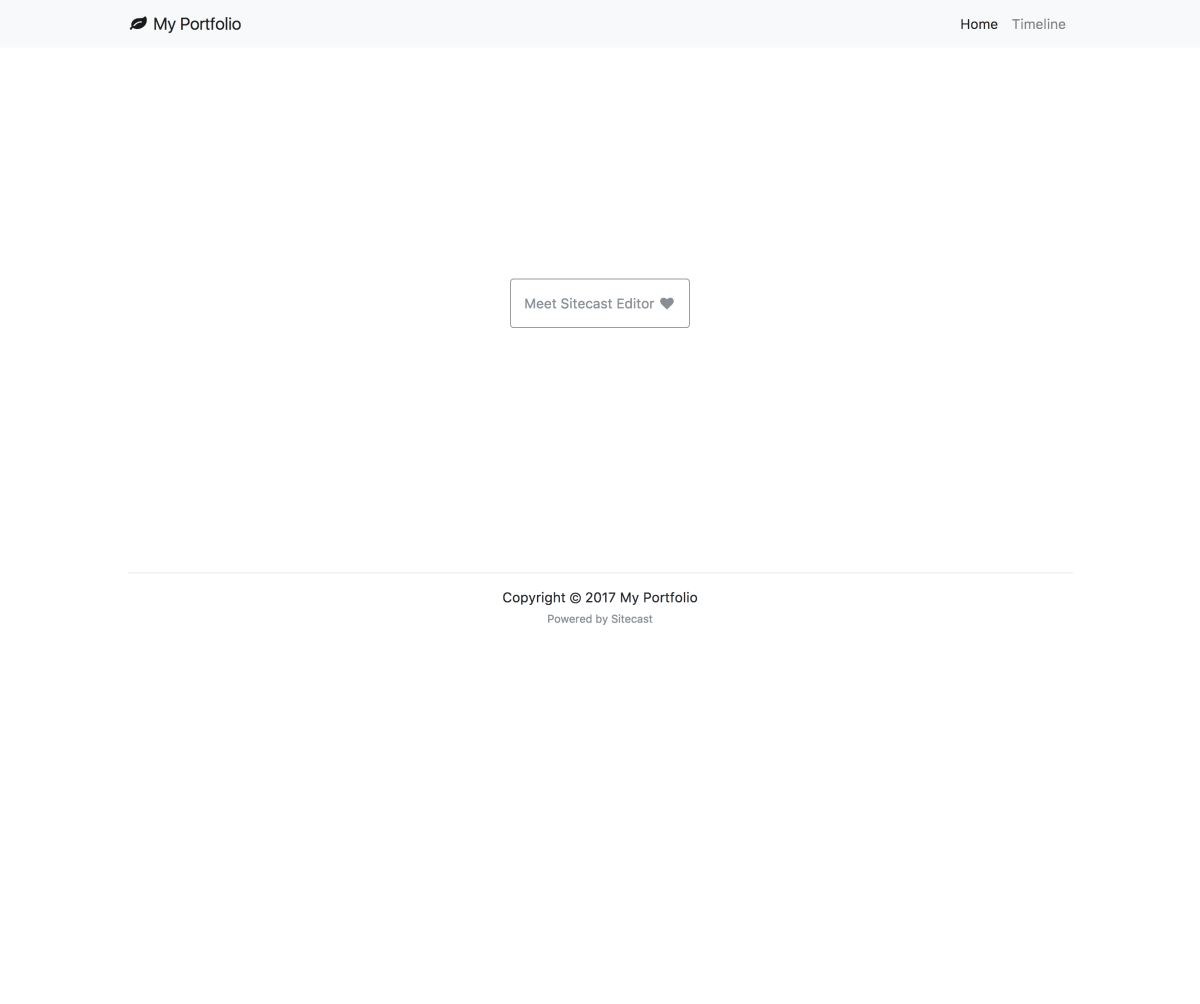
In the Blocks section, open the cover block and replace the code with the following HTML to put a call-to-action button in the middle of the page. The Bootstrap framework is already integrated into the blank app, so there is no additional configuration needed.
<div class="d-flex justify-content-center align-items-center" style="min-height:600px">
  <div class="btn-group">
    <a href="/timeline" class="btn btn-outline-secondary p-3">Meet Sitecast Editor <i class='fa fa-fw fa-heart'></i></a>
  </div>
</div>
Output of the code above:

Create A New Screen
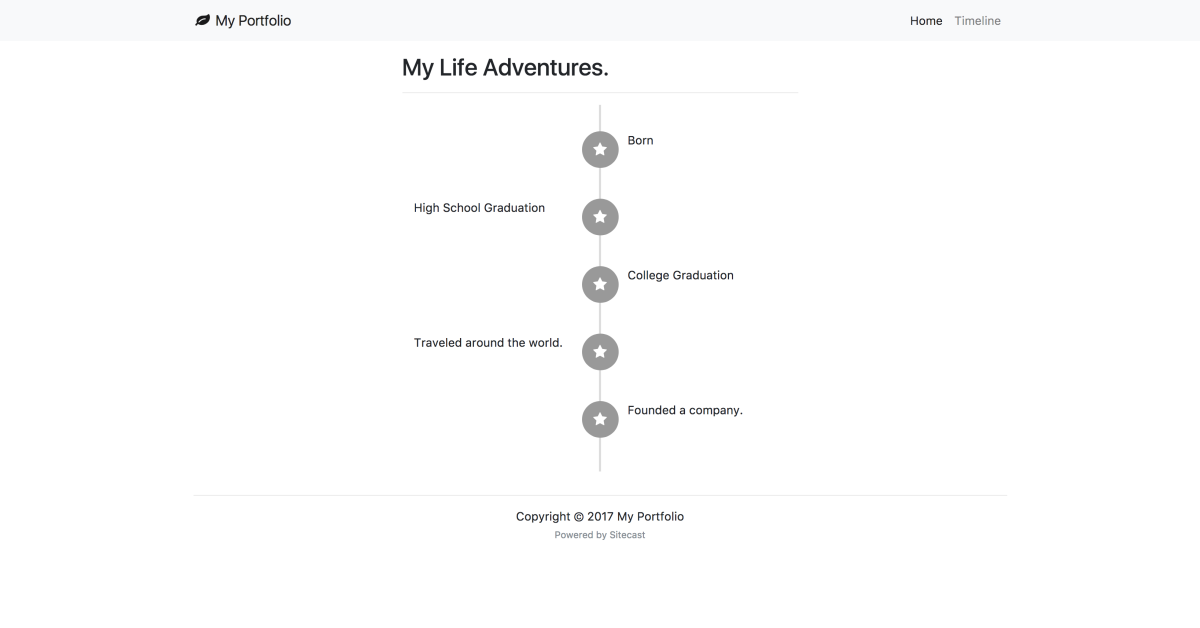
In the Screen toolbar, click new screen and name it, timeline.
Copy and paste the following code:
This set of code adds the basic timeline layout into your profile. Feel free to modify accordingly.
<div class="container">
  <div class="row d-flex justify-content-center">
    <div class="col-sm-10 col-md-8 col-lg-6 py-3">
      <h2>
        My Life Adventures.
      </h2>
      <hr>
      <ul class="timeline">

        <li class="timeline-inverted">
          <div class="timeline-badge"><i class="fa fa-star"></i></div>
          <div class="timeline-panel">
            <div class="timeline-body p-3">
              <p>Born</p>
            </div>
          </div>
        </li>

        <li>
          <div class="timeline-badge"><i class="fa fa-star"></i></div>
          <div class="timeline-panel">
            <div class="timeline-body p-3">
              <p>High School Graduation</p>
            </div>
          </div>
        </li>

        <li class="timeline-inverted">
          <div class="timeline-badge"><i class="fa fa-star"></i></div>
          <div class="timeline-panel">
            <div class="timeline-body p-3">
              <p>College Graduation</p>
            </div>
          </div>
        </li>

        <li>
          <div class="timeline-badge"><i class="fa fa-star"></i></div>
          <div class="timeline-panel">
            <div class="timeline-body p-3">
              <p>Traveled around the world.</p>
            </div>
          </div>
        </li>

        <li class="timeline-inverted">
          <div class="timeline-badge"><i class="fa fa-star"></i></div>
          <div class="timeline-panel">
            <div class="timeline-body p-3">
              <p>Founded a company.</p>
            </div>
          </div>
        </li>

      </ul>
    </div>
  </div> <!-- timeline row -->
</div>
Custom CSS/SCSS
To add the styling on the timeline block, let's modify the CSS configuration.
Copy and paste the following code into the main.scss screen:
This set of CSS configurations changes the layout and appearance of the timeline block. Feel free to change accordingly.
//Timeline
.timeline {
    list-style: none;
    padding: 20px 0 20px;
    position: relative;
    margin-bottom: 0;
    width:100%;
}

.timeline:before {
    top: 0;
    bottom: 0;
    position: absolute;
    content: " ";
    width: 3px;
    background-color: #ddd;
    left: 50%;
    margin-left: -1.5px;
}

.timeline > li {
    margin-bottom: 20px;
    position: relative;
}

.timeline > li:before,
.timeline > li:after {
    content: " ";
    display: table;
}

.timeline > li:after {
    clear: both;
}

.timeline > li:before,
.timeline > li:after {
    content: " ";
    display: table;
}

.timeline > li:after {
    clear: both;
}

.timeline > li > .timeline-panel {
    width: 46%;
    float: left;
    padding: 0;
    position: relative;
}

.timeline > li > .timeline-panel:before {
    position: absolute;
    top: 26px;
    right: -15px;
    display: inline-block;
    border-top: 15px solid transparent;
    border-left: 15px solid rgba(255,255,255,.8);
    border-right: 0 solid rgba(255,255,255,.8);
    border-bottom: 15px solid transparent;
    content: " ";
}

.timeline > li > .timeline-panel:after {
    position: absolute;
    top: 27px;
    right: -14px;
    display: inline-block;
    border-top: 14px solid transparent;
    border-left: 14px solid rgba(255,255,255,.8);
    border-right: 0 solid rgba(255,255,255,.8);
    border-bottom: 14px solid transparent;
    content: " ";
}

.timeline > li > .timeline-badge {
    color: #fff;
    width: 50px;
    height: 50px;
    line-height: 20px;
    font-size: 20px;
    text-align: center;
    position: absolute;
    top: 16px;
    left: 50%;
    margin-left: -25px;
    background-color: #999999;
    z-index: 100;
    border-top-right-radius: 50%;
    border-top-left-radius: 50%;
    border-bottom-right-radius: 50%;
    border-bottom-left-radius: 50%;
}
.timeline > li > .timeline-badge .fa {
    font-size: 20px;
    line-height: 20px;
    margin-top: 15px;
}
.timeline > li.timeline-inverted > .timeline-panel {
    float: right;
}

.timeline > li.timeline-inverted > .timeline-panel:before {
    border-left-width: 0;
    border-right-width: 15px;
    left: -15px;
    right: auto;
}

.timeline > li.timeline-inverted > .timeline-panel:after {
    border-left-width: 0;
    border-right-width: 14px;
    left: -14px;
    right: auto;
}

@media (max-width: 768px) {
  ul.timeline:before {
      left: 40px;
  }

  ul.timeline > li > .timeline-panel {
      width: calc(100% - 90px);
      width: -moz-calc(100% - 90px);
      width: -webkit-calc(100% - 90px);
  }

  ul.timeline > li > .timeline-badge {
      left: 15px;
      margin-left: 0;
      top: 16px;
  }

  ul.timeline > li > .timeline-panel {
      float: right;
  }

  ul.timeline > li > .timeline-panel:before {
      border-left-width: 0;
      border-right-width: 15px;
      left: -15px;
      right: auto;
  }

  ul.timeline > li > .timeline-panel:after {
      border-left-width: 0;
      border-right-width: 14px;
      left: -14px;
      right: auto;
  }

  .jumbotron h1 {
    font-size: 1.5rem;
  }
}
Optimizing Resources Using Sitecast Content Hub
A new URL is generated in the Sitecast Content Hub when you created a new screen.
From the Sitecast Editor, click the database button on the tool box, select and click Access Your Site's Hub. This will launch a new tab which is the content manager for the site.


Create a new account for your content storage. We recommend to use a different password than what you have used for your site editor. Go to the Resources tab. A new URL to timeline is generated which is where you could preview your new timeline screen. Fill out all the fields for optimization.
Back in the Sitecast Editor, hover over the timeline glass icon -- preview screen. Select the new resource we created timeline then Preview Screen.
Link Pages
Finally, fix the navbar to link the timeline from the cover page.
<nav id="block-{{ current_block.id }}" class="navbar navbar-expand-lg navbar-light bg-light">
  <div class="container">
    <a class="navbar-brand" href="/"><i class="fa fa-fw fa-leaf" aria-hidden="true"></i> Rubie's Portfolio</a>
    <button class="navbar-toggler" type="button" data-toggle="collapse" data-target="#navbarSupportedContent" aria-controls="navbarSupportedContent" aria-expanded="false" aria-label="Toggle navigation">
      <span class="navbar-toggler-icon"></span>
    </button>

    <div class="collapse navbar-collapse" id="navbarSupportedContent">
      <ul class="navbar-nav ml-auto">
        <li class="nav-item active">
          <a class="nav-link" href="/">Home<span class="sr-only">(current)</span></a>
        </li>
        <li class="nav-item">
          <a class="nav-link" href="/timeline">Timeline<span class="sr-only">(current)</span></a>
        </li>
      </ul>
    </div>
  </div>
</nav>
At this point, all the links should be properly linked and functional. As always, qualify your timeline before deployment.
Now that you have the fundamentals of the editor, keep styling, keep building and keep having fun!
Please do not hesitate to reach out to the Sitecast team for clarification, guidance, or suggestions. We would love to hear from you at [email protected].
Good luck Sitecaster!