Tutorials
How To Code A Restaurant Menu And Website
by Rubie Tiburcio
In this tutorial we will build a static website for a restaurant with a basic menu page and about page. All code blocks are reusable.
From your Sitecast Dashboard, build a new site Sitecast Cafe. Choose the Blank App, read the prerequisite, and click Install & Start Coding to get started.
Sitecast Cloud Development Environment
In the Sitecast Editor’s Toolbar, go to the App Details tab, select and click Development Site. This will launch the default home page created for your development environment. This URL is automatically provisioned and live through the Sitecast Cloud.
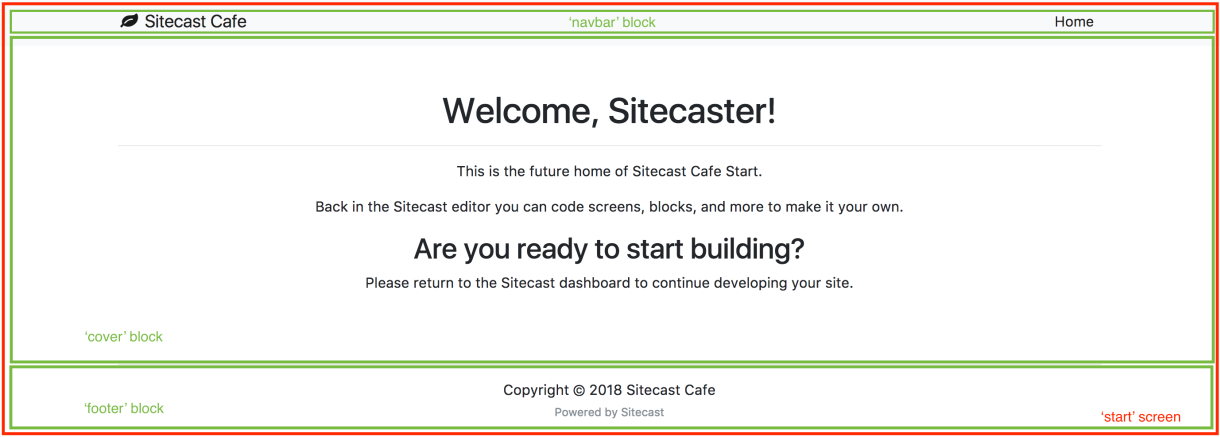
The image below describes the various blocks of the default page. The screens and blocks structure is a concept within Sitecast to simplify your front-end code and avoid redundancy in the code. By creating screens and blocks, you will be able to reuse code across different parts of the application.
For the default page in the development environment, we started with a single screen called start. The start screen has one block in it, the cover block.
The navbar and footer block were added in the parent HTML file which is in application.html. This means the navbar and the footer blocks are added in any screen throughout the app. If you want these blocks to only exist in certain pages, you will need to move it into the screen file and add the blocks accordingly.

To accelerate development and solidify your designs, we leverage & precompile Bootstrap and other packages inside the default app. These are configured within sitecast.config.yml.
Renaming Blocks
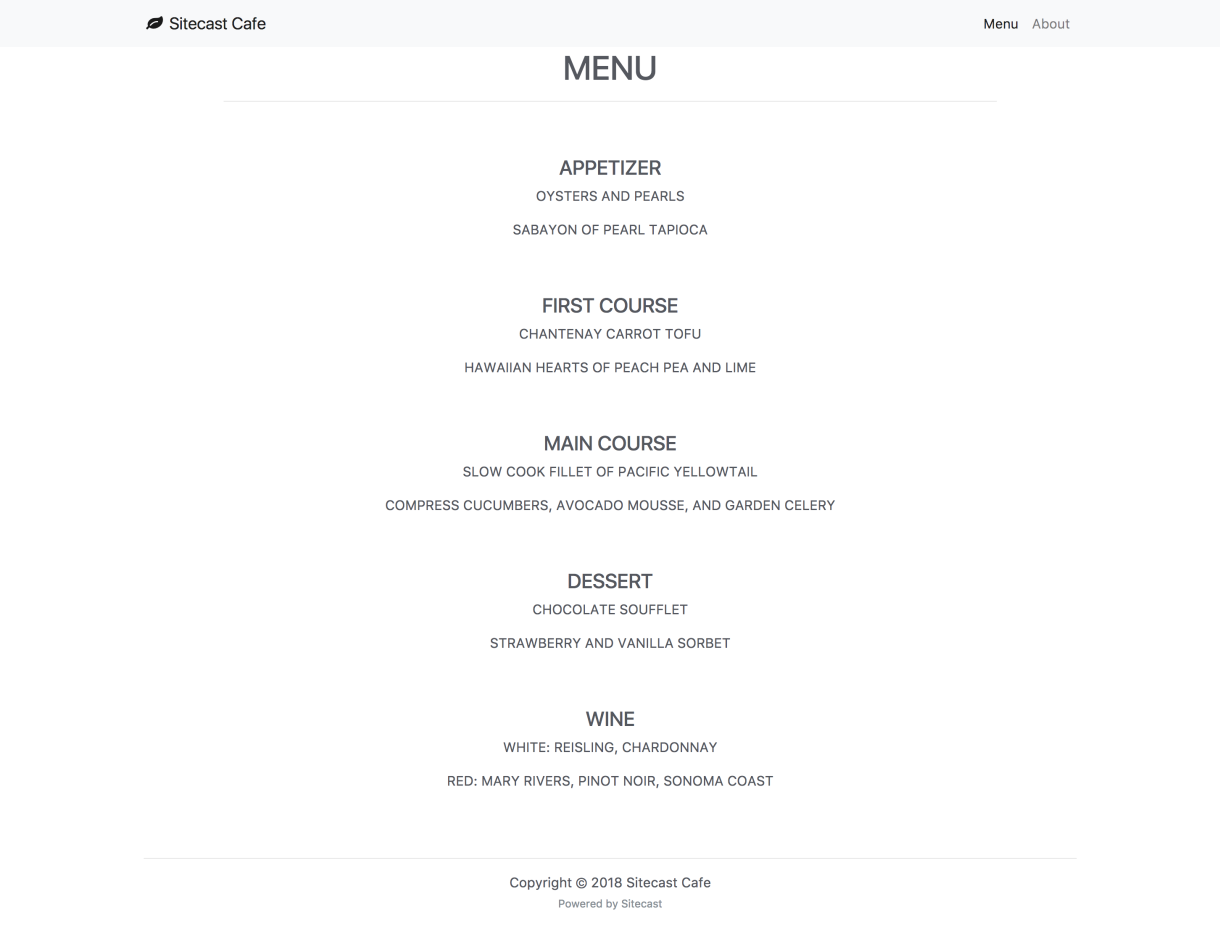
To modify the body of the cover block, go to the cover block file in your app's file directory. Click the settings button and rename the block to menu. You will need to update the start screen to add menu instead of cover.
Modifying Block Content
Copy and paste the following code. Each item in the menu is hard coded in the cover block. Save the changes and view your changes in the development environment URL.
<div class="container">
  <div class="row d-flex justify-content-center">
    <div class="col-10 pb-5 text-center">
      <h1 class="quicksand-font header text-uppercase">Menu</h1>
      <hr>
    </div>
  </div>
  <div class="row d-flex justify-content-center">
    <div class="col-10 pb-5 text-center">
      <h4 class="text-center quicksand-font text-uppercase">Appetizer</h4>
      <p class="text-uppercase">Oysters and Pearls</p>
      <p class="text-uppercase">Sabayon of pearl tapioca with island greek oysters</p>
      <p class="text-uppercase">White Sturgeon Caviar</p>
    </div>
  </div>
  <div class="row d-flex justify-content-center">
    <div class="col-10 pb-5 text-center">
      <h4 class="text-center quicksand-font text-uppercase">First Course</h4>
      <p class="text-uppercase">Chantenay Carrot Tofu</p>
      <p class="text-uppercase">Hawaiian Heart of Peach Pea and Lime</p>
    </div>
  </div>
  <div class="row d-flex justify-content-center">
    <div class="col-10 pb-5 text-center">
      <h4 class="text-center quicksand-font text-uppercase">Main Course</h4>
      <p class="text-uppercase">Slow Cook Fillet Of Pacific Yellowtail</p>
      <p class="text-uppercase">Compress Cucumbers, Avocado Mousse, And Garden Celery</p>
    </div>
  </div>
  <div class="row d-flex justify-content-center">
    <div class="col-10 pb-5 text-center">
      <h4 class="text-center quicksand-font text-uppercase">Dessert</h4>
      <p class="text-uppercase">Chocolate Soufflet</p>
      <p class="text-uppercase">Strawberry and Vanilla Sorbet</p>
    </div>
  </div>
  <div class="row d-flex justify-content-center">
    <div class="col-10 pb-5 text-center">
      <h4 class="text-center quicksand-font text-uppercase">Wine</h4>
      <p class="text-uppercase">White: Reisling Chardonnay</p>
      <p class="text-uppercase">Red: Mary Rivers, Pinot Noir, Sonoma Coast</p>
    </div>
  </div>
</div>

Designing Websites
To design the website, add all of the styles into stylesheets/main.scss.
Sitecast will automatically compile any SCSS into compressed CSS when deployed. For demo purposes, let's quickly change the text color.
body {
  color: #555860;
}
Adding New Page
Next, let's create a new screen for the restaurant's about page.
Create a new screen: about. Let’s first leave this blank as a place holder.
This will also create a URL called your-domain.com/about
Creating A New Block
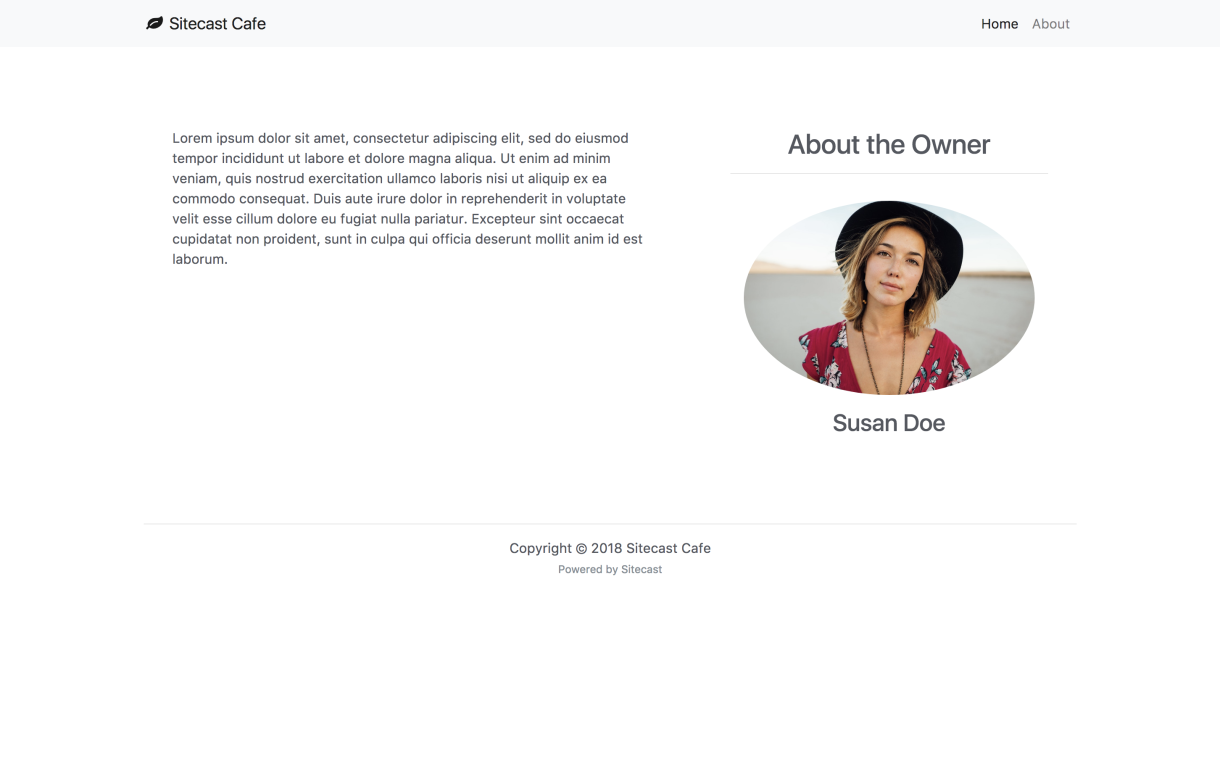
Create the bio block.
<div class="container px-3">
    <div class="row my-5 sc_box_shadow">
      <div class="col-md-7 p-sm-5">
        <p>Lorem ipsum dolor sit amet, consectetur adipiscing elit, sed do eiusmod tempor incididunt ut labore et dolore magna aliqua. Ut enim ad minim veniam, quis nostrud exercitation ullamco laboris nisi ut aliquip ex ea commodo consequat. Duis aute irure dolor in reprehenderit in voluptate velit esse cillum dolore eu fugiat nulla pariatur. Excepteur sint occaecat cupidatat non proident, sunt in culpa qui officia deserunt mollit anim id est laborum. </p>
      </div>
      <div class="col-md-5 bg-map-inverse p-5">
        <h2 class="text-center">About the Owner</h2>
        <hr>
        <img class="img-fluid rounded-circle p-3" src="https://source.unsplash.com/pAs4IM6OGWI" data-crop="scale" data-width="1200" data-quality="auto">
        <h3 class="text-center">Susan Doe</h3>
      </div>
    </div>
</div>
For reference, there is a tutorial on How To Code Images Using Unsplash.
Adding Block To Screen
Attach the bio block to the about screen.
{{ blocks.bio.body }}
Save the changes, go back to the /about page in a new tab in your browser.

Linking Pages
Link the about page on the navbar. Also, rename the Home title to Menu. Be sure to use a relative link, meaning do not include a domain name.
<li class="nav-item">
   <a class="nav-link" href="/about/">About<span class="sr-only">(current)</span></a>
</li>
Sitecast Hub: Integrated Content Management System (CMS)
Sitecast Editor has an integrated Content Management System. By leveraging this feature, you can make the items on the list dynamic and enable you to reuse the template, let’s create item types for “Appetizer”, “First Course”, “Main Course”, “Dessert”, “Wine”. These item types will be pluralized when they get created. Also, by default, each of these item types will have a title and description field in the form.
In the toolbar, go to the content hub and add new item type.

Using the Liquid syntax, we will dynamically generate the menu items and create fields for each item instead of hard coding the values. From the content hub, slowly migrate the hard coded value for each item type.
For instance, the appetizer will be refactored to these lines of code:
    <h4 class="text-center quicksand-font">APPETIZER</h4>
  {% assign appetizers = item_types.appetizer.published_items %}
  {% for appetizer in appetizers %}
    <p class="text-uppercase">{{appetizer.title}}</p>
  {% endfor %}
Add Your Menu Items
From the toolbar, navigate to your development’s content hub. You will be prompted to create a separate login as this will serve as your web project's unique content admin area. We recommend each user to use a password manager to improve the security of your projects.
Inside the hub, you will be able to add all of the items you've previously created via item types.
Leverage Bootstrap Framework
To uppercase the letters, we support the liquid templating filter upcase but we recommend to use the Bootstrap css class text-uppercase.
That's it, congrats! You now have a dynamic menu anyone can update from the hub.
Next Steps
Now that you have a basic menu, here are some ideas to take the website to the next level: